This page has been automatically translated. Remove this note to disable the automatic translation of this page.
¶ Newsletters for your local group or community group
XR CRM offers your group the opportunity to send newsletters to all interested parties within your region. Anyone who has indicated that they wish to receive a newsletter when registering on the national website will receive your local newsletter.
Newsletters are an effective means to increase the involvement of your audience. They offer the opportunity to share important updates, upcoming events and specific actions directly, increasing connectivity with local interests and enhancing communication.
¶ Role
A specific role is available to manage a newsletter. This role gives access to all necessary functions: creating a newsletter, viewing the list of subscribers, and sending the newsletter.
This role can be combined with another role within XR CRM if you wish, but this is not mandatory. To request this role you can contact the XR CRM team.
¶ Functions
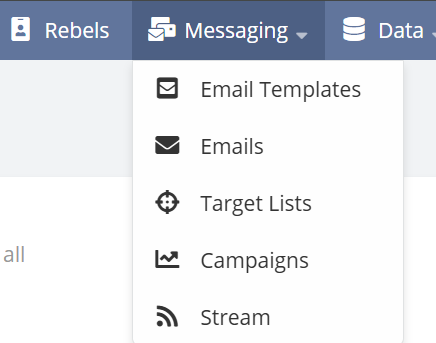
The functions required to provide a newsletter are: e-mail template, Target lists and campaigns. These can be found in the menu options.
</ details>
For each newsletter you set up an email template, which ultimately forms the content of the newsletter itself. The target list includes all persons who have indicated that they wish to receive the newsletter. In a campaign these two elements come together: the template and the target group are linked, and from the campaign you take care of the shipping and management of one or more mailings.
¶ Email Template
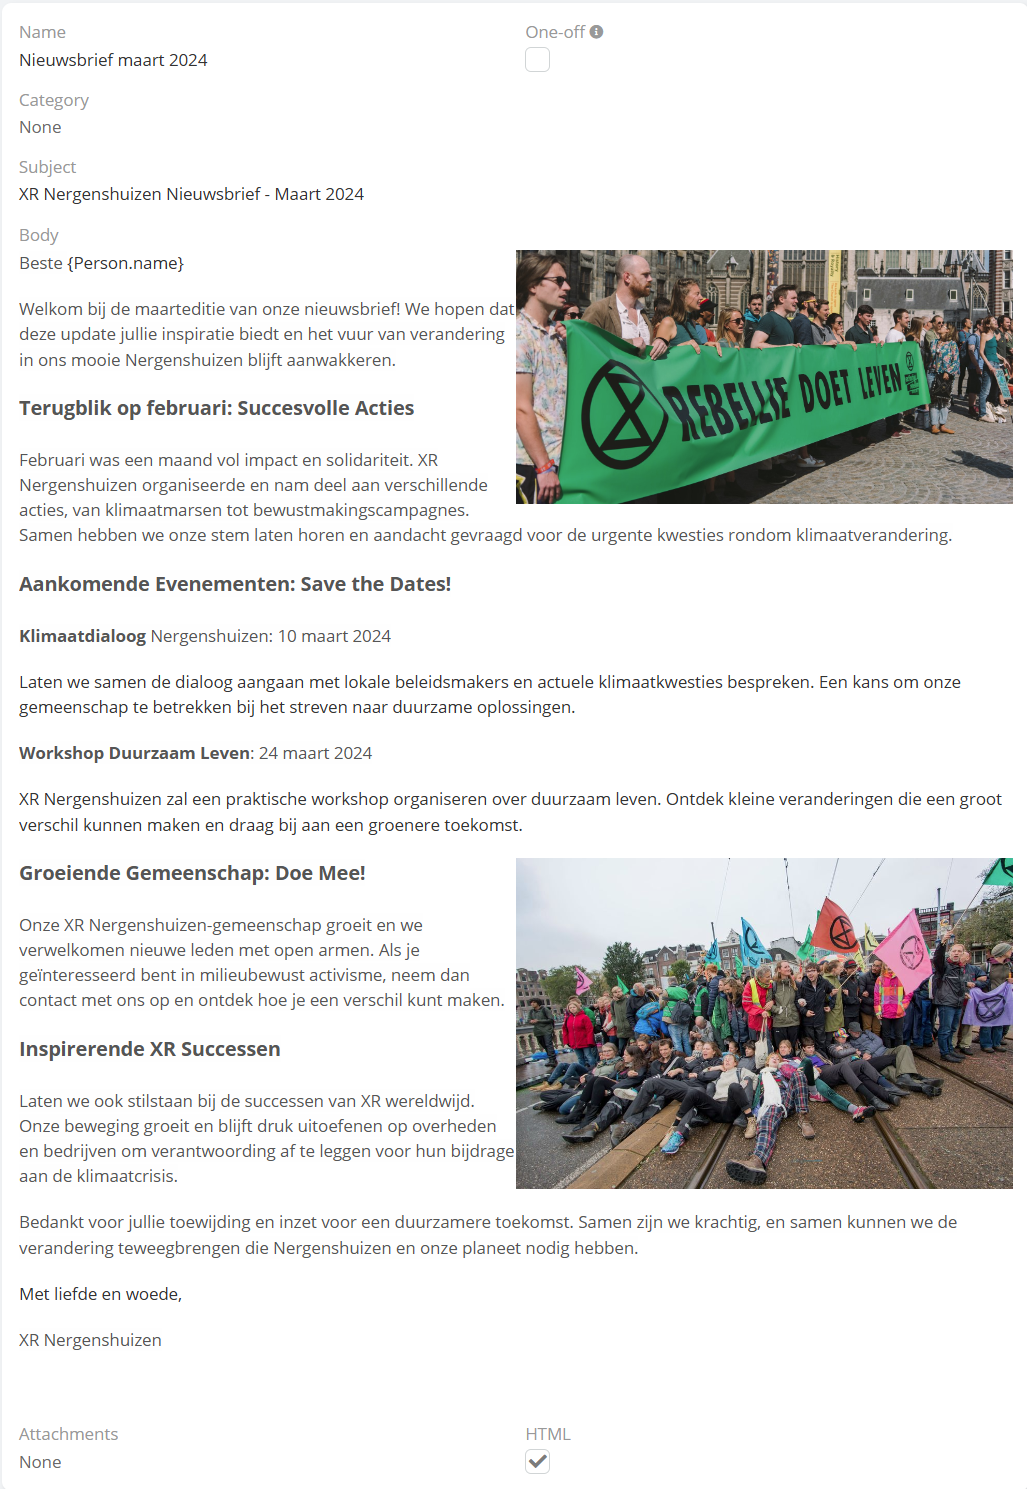
The newsletter is set up as an email template, in the same way as creating email templates for individual messages to rebels. More about this, read here. It is useful to give the newsletter template a name that clearly describes the content, such as "Newsletter LG Nogenshuizen - March 2024." This way you keep it clear and you can easily find the right newsletter.
</ details>
¶ Target list
The target list is an automatically updated list of newsletter subscribers that is always up to date with the latest logins. Unsubscriptions (opt-outs) and non-existing e-mail addresses (bounced) are also recorded here, so you are sure that the newsletter is only sent to active, interested recipients. This list is fully automated, so you don't have to change it yourself.
¶ Campaigns
The newsletters are sent within a campaign. Although it is possible to create a new campaign for each newsletter, we recommend that all newsletters be combined within one campaign. This keeps the management clear and ensures an efficient organisation of all sent mailings.
¶ Your first campaign
Select the Campaign menu item.

</ details>
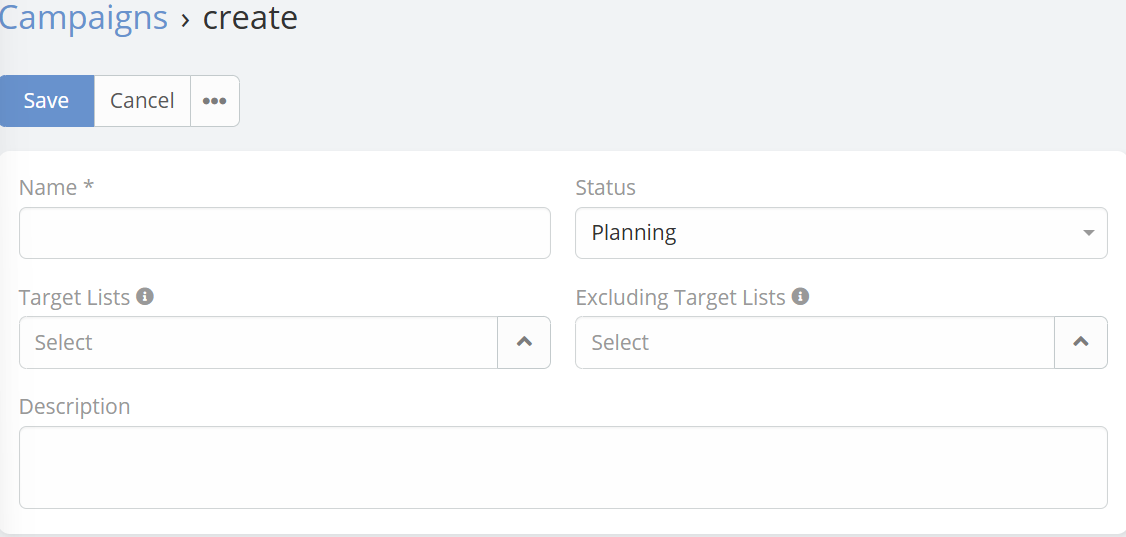
A page will appear in which you create the campaign.
</ details>
Name the campaign. If you intend to post all newsletters within this campaign, then choose a generic name such as "Newsletter LG Nogenshuizen." Then select your target list; There is only one available, so this choice is simple. You can also ignore the other fields. Then save the campaign by clicking "Save."
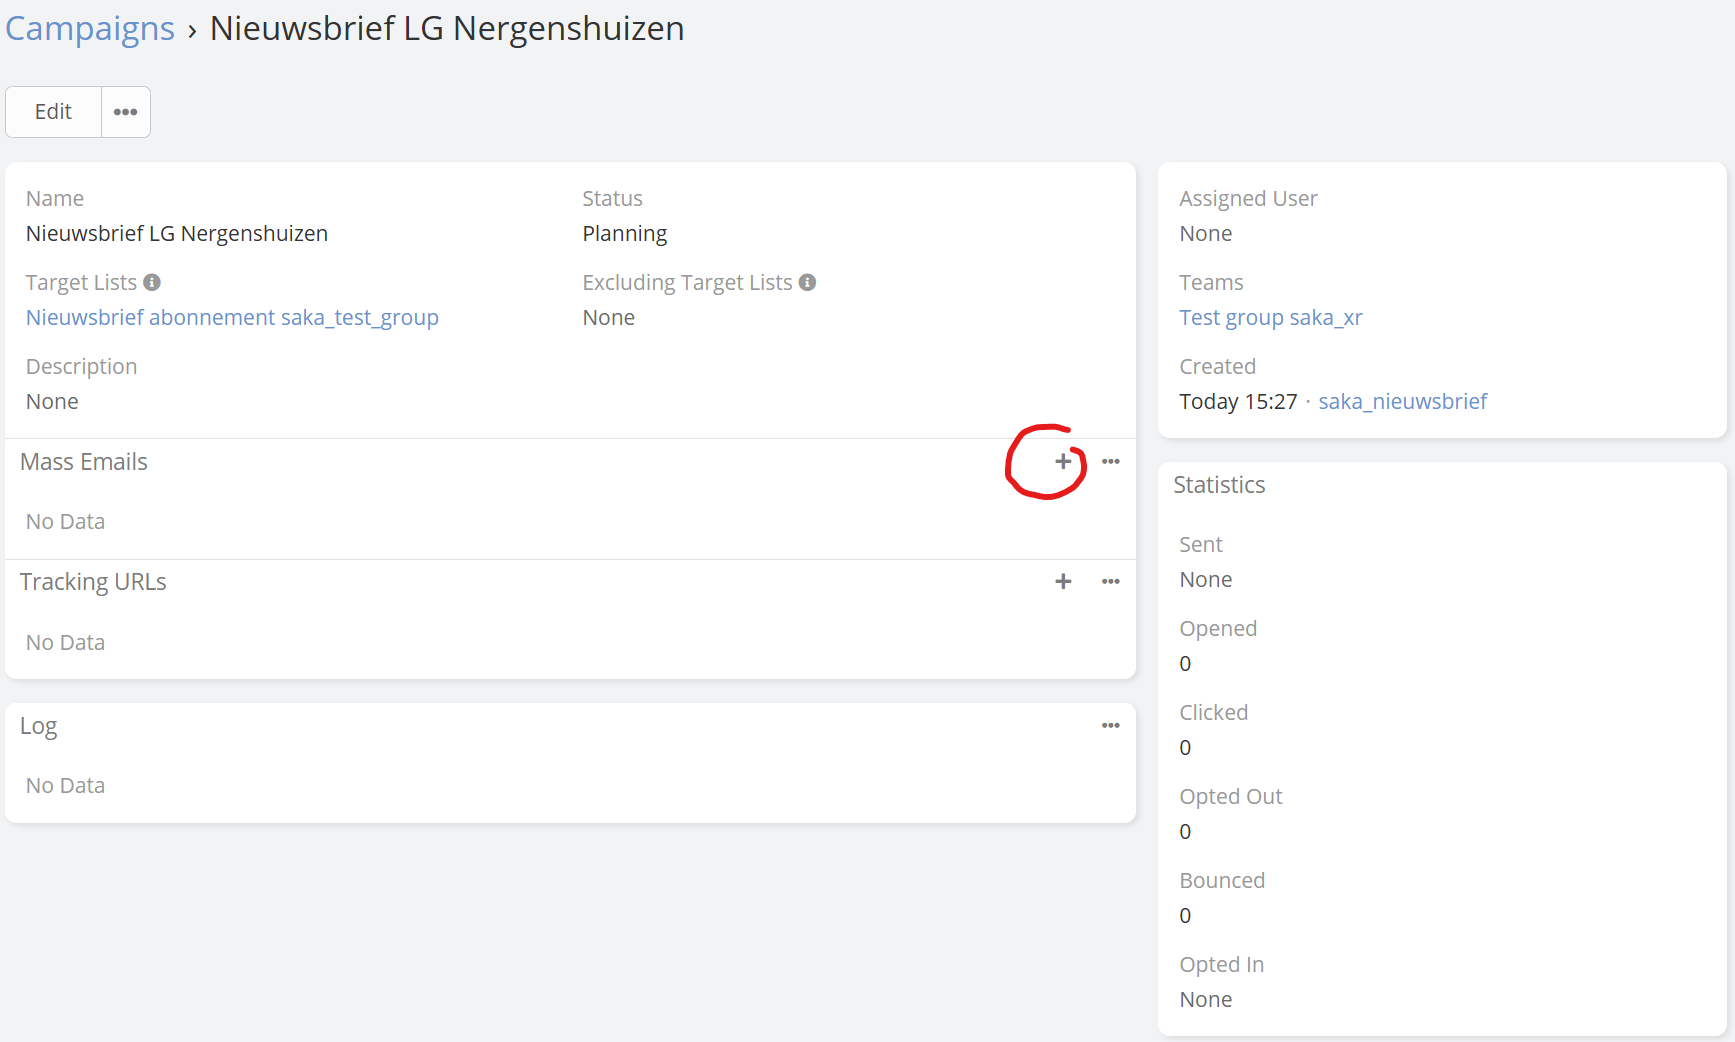
The content of the newly created Campaign is now opening.
</ details>
In this screen, you can add your first newsletter using the plus symbol in the Mass Emails field.
Press the plus symbol.
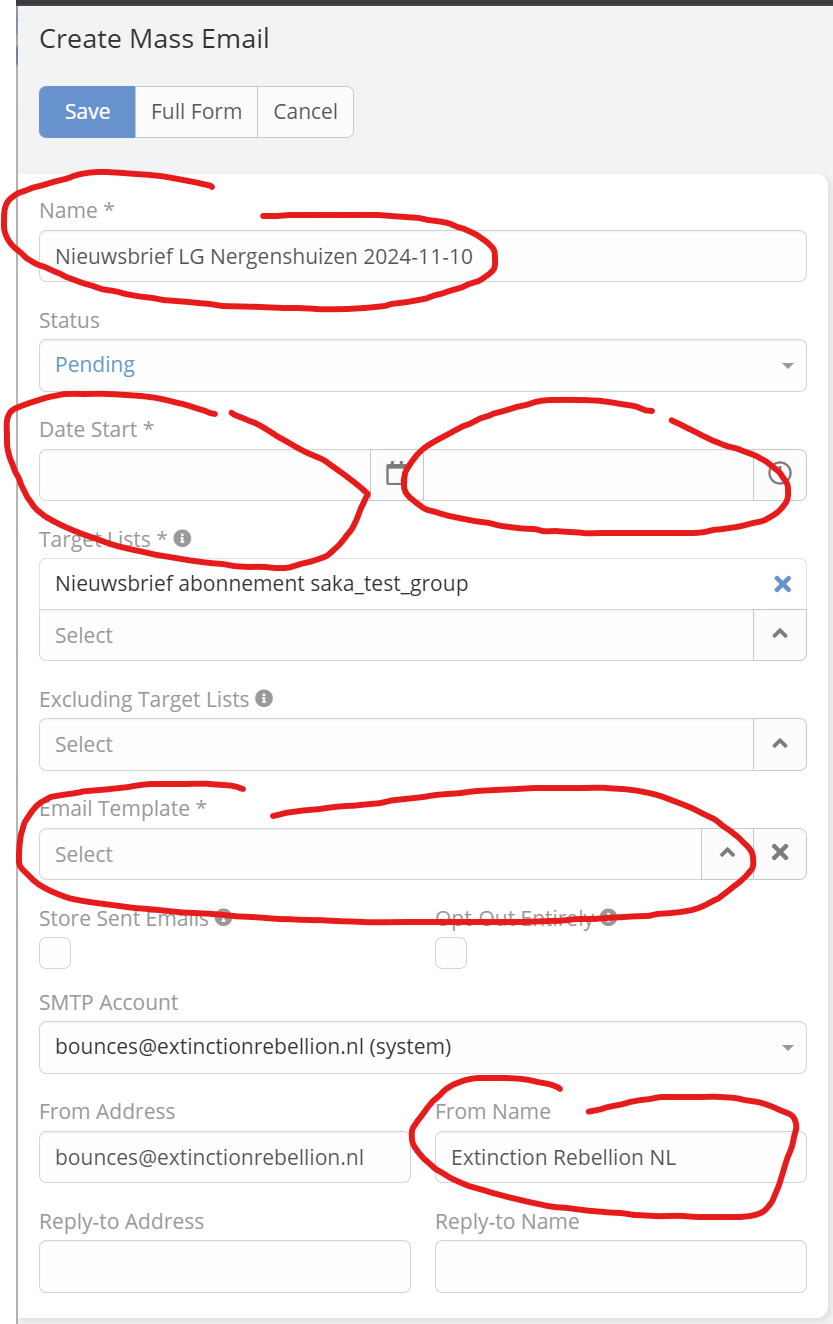
Now you can configure sending the newsletter.
</ details>
The circled fields must be filled in.
Name: This field has already been filled in, but for a clear administration it is useful to use a recognizable name, for example "Newsletter March 2024."
Date Start: Enter the date and time when the newsletter is sent. The first field is for the date and the second for the time. Pick a time in the future! It is wise to fill in this field only when the newsletter is fully ready to prevent a draft newsletter from being sent accidentally.
Opt-Out Entirely
If you check it, the recipient will be written out of all future mailings, both within this campaign and other campaigns. If you leave this blank, the deregistration only pertains to this campaigne.
Sending will start after this moment but does not necessarily start at this time. This depends on the load and internal clocks of the system. In practice it will be between 5 minutes and half an hour.
To limit the load of XR CRM, up to 600 emails per hour are sent.
Email Template: Select the e-mail template you created earlier here, for example "Newsletter LG Nogenshuizen - March 2024."
From Name: This field can be adjusted, but not required. Consider filling in the name of your local group, such as "Extinction Rebellion Nowhere" in this example.
Fill in these fields and check that everything is correct before saving the campaign.
Pay attention! Leave all other fields untouched. An incorrect selection in these fields may result in the newsletter not being sent or only partially.
Save this configuration by clicking "Save." Everything is now ready and the newsletter will be sent automatically from the set time.
Send a test copy to yourself
From the campaign-mass email screen you have a button to send yourself a test copy. This copy will be sent to the email address linked to your account within XR CRM. You can check this email address by going to your profile page. Before you plan the mailing it is highly recommended to use it.
¶ Logbook
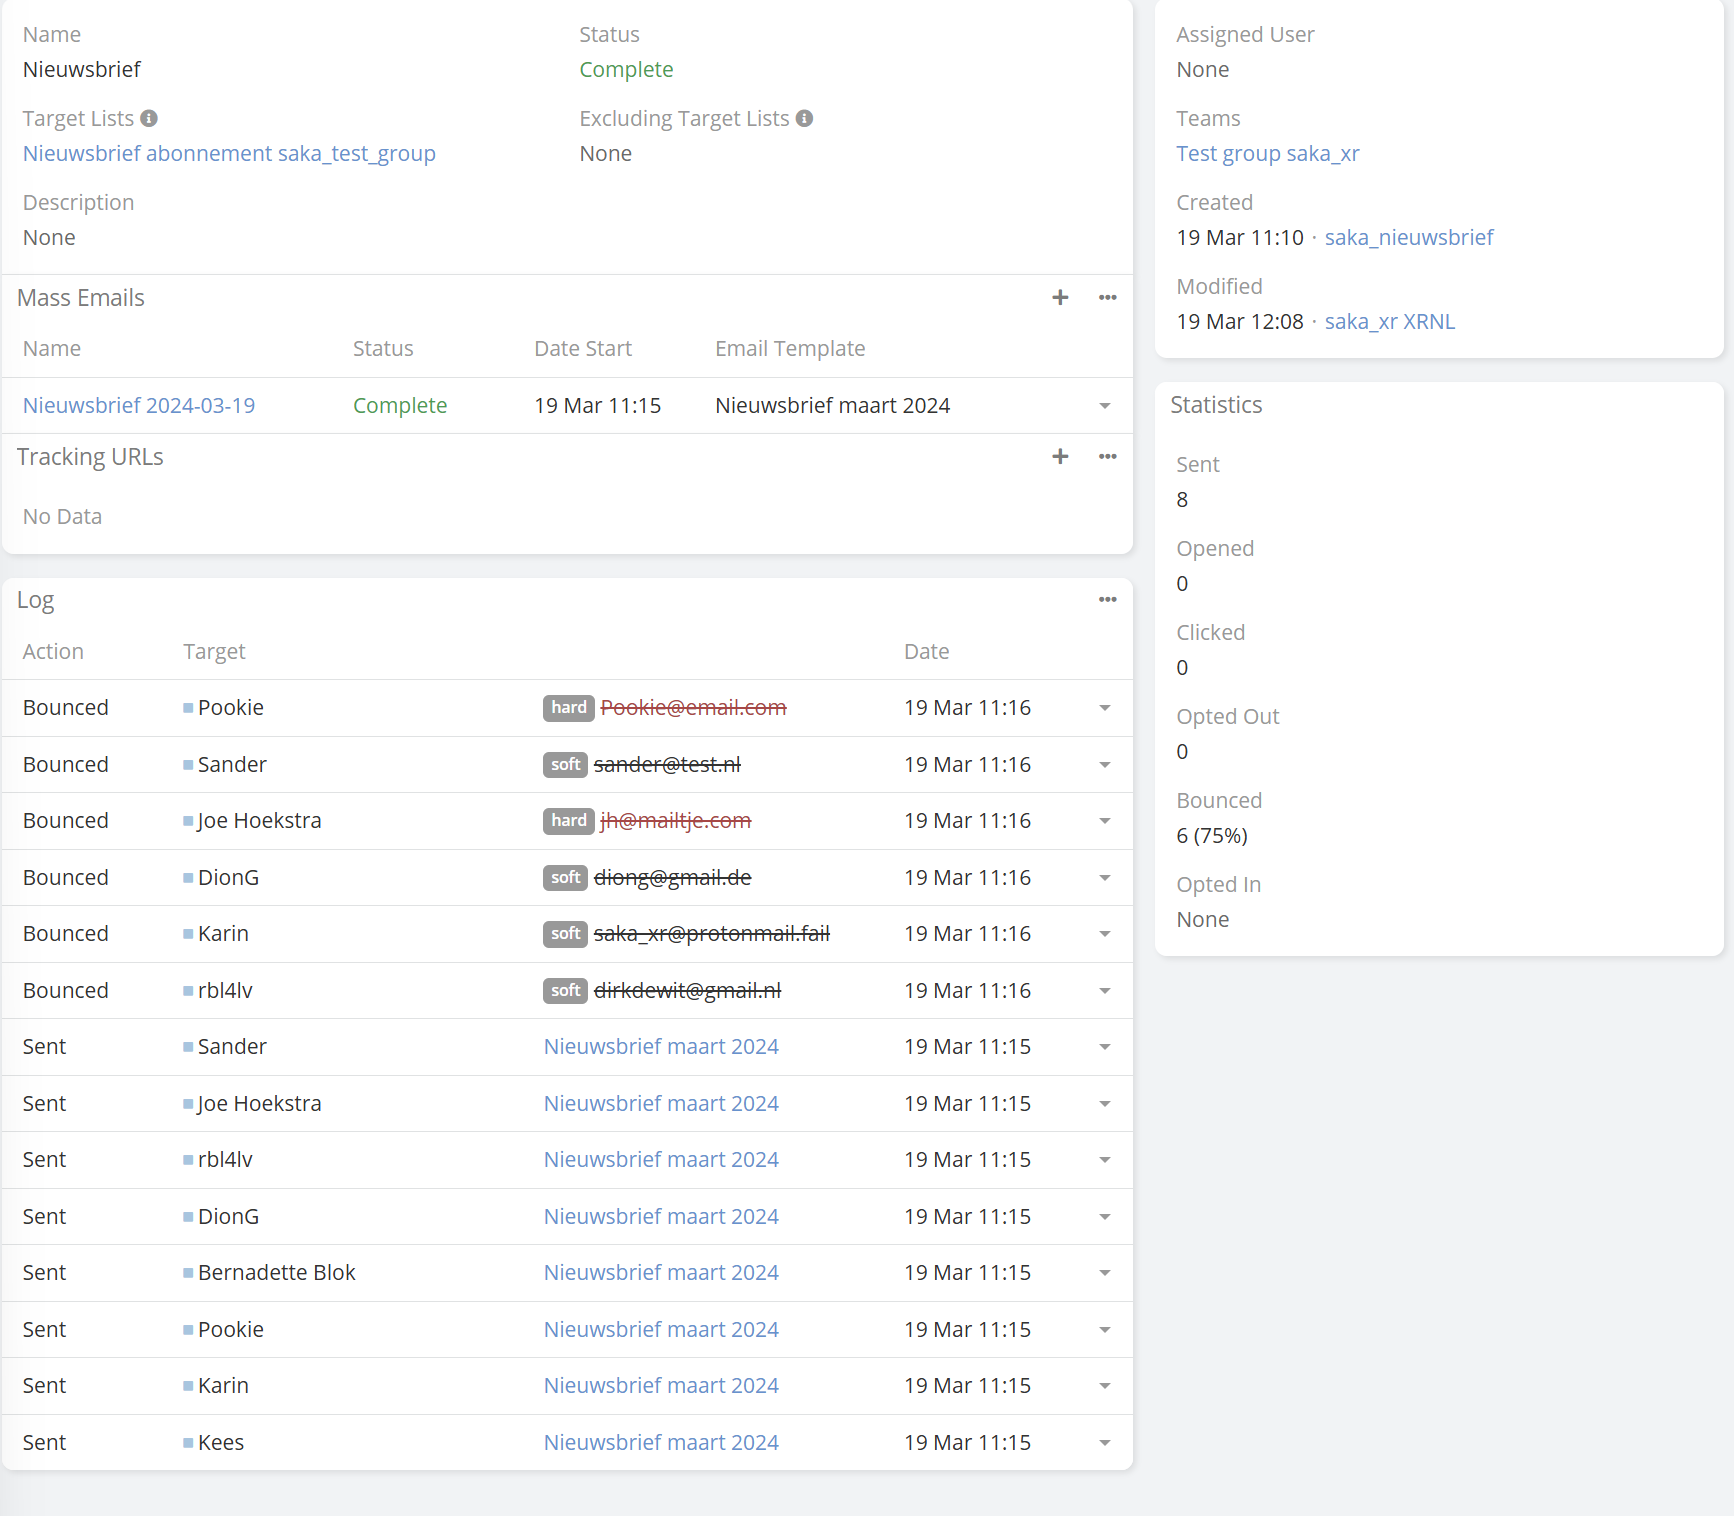
After sending the newsletter, a log is automatically kept. Go to the campaign page to see this. Once all emails have been sent, the status behind the mass email "Newsletter March 2024" will be updated to complete. With this you know that the shipping process is complete.
</ details>
In the log you can find detailed information about each individually sent email. This includes the status of dispatch: Sent (sending expired correctly), Bounced (the email address is incorrect), who received the email and the time of dispatch.
On the right side of the log you see some statistics, such as:
The number of emails sent.
How many people have opened the e-mail.
The number of people who have signed out for the newsletter (Opted-Out).
The percentage of incorrect email addresses in the target list.
The newsletter contains an Opt-Out option by default, for which you do not have to take any action. Anyone who unsubscribe is automatically excluded from the subsequent mailings, so that you only reach relevant recipients.
¶ The following newsletters.
To prepare the following newsletters, follow the steps below:
Create a new email template: Create a new template for the newsletter you want to send.
In the Campaign screen: Go to the Mass Emails section and click on the plus symbol. In the window that opens, select the new email template you created and fill in the other configuration fields.
Repeat these steps for each newsletter you want to send. This way you ensure that every newsletter is correctly set up and sent.
.